Sunday, January 30, 2011

Baked Spaghetti Squash


I love trying all new kinds of squash.  In the winter when much of the produce seems a life time away, it's wonderful to have fresh, flavorful produce.   Bryant was surprised that the spaghetti squash actually tasted and had a similar texture to spaghetti.  I love the slight crunch that comes from the squash. It made for a delicious, fresh side dish!

This was also a really simple dish to make - just a short list of ingredients.  From start to finish, there is not a lot of hands-on work although it does take some time for the spaghetti squash to bake in the oven (about an hour).  Next time, I might try baking the squash the night before I want to serve it to make dinner incredibly fast. 

Baked Spaghetti Squash
Taken from: Steamy Kitchen
Serves 4
  • 1 spaghetti squash (3-4 pounds)
  • 2 tablespoons butter
  • 2-4 cloves garlic, minced (depending on if you are a garlic lover)
  • 1/4 cup fresh basil, chopped (or substitute fresh chopped parsley)
  • 1/2 teaspoon kosher salt
  • 1/4 cup freshly grated parmesan (I forgot to add this and it was still delicious!)
-Preheat oven to 375F. Bake spaghetti squash for 60 minutes, or until a paring knife pierces easily through skin with little resistance. Let squash cool for 10 minutes.
-Cut squash in half, lengthwise. Use a fork to remove and discard the seeds. Continue using fork to scrape the squash to get long, lovely strands. If the squash seem difficult to scrape, return the squash to bake for an additional 10 minutes.
-Heat a large saute pan with the butter and the garlic over medium-low heat. When garlic becomes fragrant, add parsley, salt and spaghetti squash strands. Toss well, sprinkle in the parmesan cheese and taste to see if you need additional salt. The spaghetti squash should have a slight crunch but if you like it softer, cover the pan and cook 2 more minutes.

Tuesday, January 25, 2011

Mudajara

Growing up, we would occasionally go to a Mediterranean bakery and pick up tons of different things for a delicious Greek dinner. It was so much fun to have such different dishes - I loved the tzatziki and the hummus but my sister's favorite dish (by far) was the mudajara.  Mudajara (also spelled mudajarah among several other variations) is a Greek lentils and rice dish; however, the real secret to it is the caramelized onions.  My mom joked that you can't have enough caramelized onions and it's true! I added 2 whole onions to this dish and would consider adding even more next time.

This dish is incredibly good for you and was pretty simple -- it only needed a few ingredients, all of which were in my pantry). The prep work couldn't be simplier but it does take quite a bit of cooking time.  However, I made the caramelized onions several days in advance and even made the mudajara a day ahead.  About 20 minutes before dinner time, I threw the pre-cooked mudajara in a pot on medium-low with an extra 1/2 cup of chicken broth, covered the pot and stirred occasionally. It really made dinner easy that night!

(We were too hungry for photos.  And let's just say that mudajara tastes much better than it looks!)

Mudajara
Taken from: Elly Says Opa
Serves: 3-4
  • 1.5-2 Tbsp. olive oil
  • 2-3 medium yellow onions, cut in half and then into slices
  • 1 tsp. cumin
  • 2 bay leaves
  • 1/4 tsp. cinnamon
  • 1/2 cup lentils, rinsed and picked over
  • 1/2 cup brown rice
  • 2.5 cups water, broth or a combo (you may need extra)
  • salt and pepper
-Caramelized onions (can be done ahead of time): Heat a deep saute pan or medium saucepan over medium heat.  Add the olive oil.  Once hot, add the onions.  Cook for two or three minutes over medium heat and then reduce to medium-low.  Cook, stirring occasionally, until onions are a dark golden brown, about 20-30 minutes.
-Stir in the cumin, bay leaves, cinnamon, lentils and brown rice and saute for a minute before adding the liquid. Season lightly with salt and pepper.  Increase the heat to bring to a boil.  Cover and simmer until the rice and lentils are tender, about 45 minutes, stirring occasionally and adding extra liquid if necessary.  Season to taste with salt and pepper.

Sunday, January 23, 2011

Homemade Pancakes & Week's Menu Plan

Pancakes and eggs are an after-church Sunday lunch tradition in my family.  We take our pancakes very seriously...and our maple syrup, too.  My dad is from New York state so we always had real Grade B maple syrup in the house.  (You might think this is a little crazy extreme but we even take our own syrup to restaurants. I say it's just plain smart -- who wants to have gummy, artificially sweetened corn syrup when you can have the real thing?)

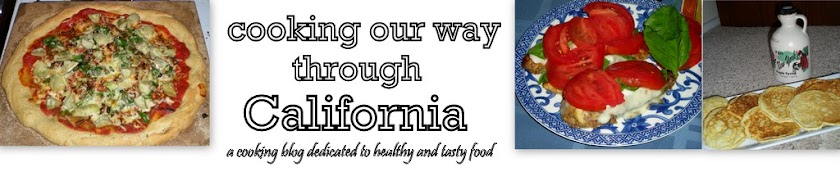
As usual, the blog Smitten Kitchen came through as I was searching for a pancake recipe.  This is a great recipe - it was originally for blueberry pancakes but it's January so we nixed them (and I don't really like blueberry pancakes, anyway). Plus, we wanted to top ours with cinnamon sugar or Nutella or (surprise, surprise) real maple syrup. I love the blog Smitten Kitchen but tweaked a few things: less sugar, less buttermilk and less butter (I have learned I can often cut the butter/oil/fat in half without really missing it).  Bryant declared the best pancakes he had ever had, so we didn't miss these foregone ingredients.


Homemade Pancakes
Taken from: Smitten Kitchen
Makes 20ish pancakes 
  • 2 cups all-purpose flour
  • 2 teaspoons baking powder
  • 1 teaspoon baking soda
  • 1/2 teaspoon salt
  • 2 tablespoons sugar
  • 2 large eggs, lightly beaten*
  • 2 cups buttermilk (a great substitute I use is for each cup of buttermilk, add 1 Tbsp of white vinegar or lemon juice to a 1-cup measurer and then fill up the rest of the way with milk) 
  • 2 tablespoons unsalted butter or Smart Balance, melted, plus 1 tablespoon extra for brushing griddle
* I used this trick to try to make the pancakes even lighter: separate the eggs, mix the yolks with the buttermilk and butter, but whip the egg whites in a separate bowl until stiff. If you fold the egg whites gently back into the batter–this should be your very last step–your pancakes will be unbelievably light, with an extra-crisp edge.

-Whisk together the flour, baking powder, baking soda, salt, and sugar in a medium bowl. In a small bowl, whisk the eggs (or just egg yolks), buttermilk, and 2 tablespoons melted butter together.  Add to the dry ingredients and whisk lightly to combine but do not overmix. (Optional step: Gently fold in the egg whites with a spatula.) The batter should have small to medium lumps. Set aside to let the batter rest (this is an essential step).
-Preheat an electric griddle to 350-375°F, or place a griddle pan or cast-iron skillet over medium heat. Test the griddle by sprinkling a few drops of water on it. If the water bounces and spatters, the griddle is hot enough. Using a pastry brush, brush a bit of the remaining melted butter onto the griddle.
-Using a 1/4 cup measurer, pour the batter in pools 2 inches apart.  When the pancakes have bubbles on top and are slightly dry around the edges, about 2 1/2 minutes, flip over. Cook until golden on bottom, about 1 minute.
-Repeat with the remaining batter. You can keep the finished pancakes on a heat-proof plate in the oven at 175°F. Serve warm with any of your favorite toppings - fruit, cinnamon & sugar, Nutella, maple syrup, butter, etc.


Week's Menu Plan

Monday: Mujadara and spanakopita

Tuesday: Grilled scallop ceviche with wild rice pilaf

Wednesday: Flank Steak with wine mushroom sauce with polenta and roasted Brussels sprouts
 
Thursday: spaghetti squash with homemade sauce and turkey meatballs

Friday: homemade pizza

Wednesday, January 19, 2011

Crisp Ravioli

Forgive all the ravioli recipes but this was just too good to pass up.  After making homemade ravioli, I usually boil it for a quick and delicious meal.  However, this was a great twist on the usual ravioli - it's lightly breaded with a panko/parmesan mixture and then pan fried in a little olive oil. And another plus? It doesn't take much longer than boiling ravioli. So, so good!

We served it with a homemade chunky tomato sauce which just put it over the top.  In the dead of winter, we don't have basil around but I can't wait for summer to use this recipe with basil.


Crisp Ravioli
Taken from: Handle the Heat via Cooking Light
  •  2 tablespoons water
  • 1 large egg, lightly beaten
  • 1 cup panko (or substitute breadcrumbs)
  • 1/4 cup grated fresh parmesan cheese
  • 1 (9-ounce) package fresh ravioli (or make your own! Be careful using frozen, however.)
  • 4 tablespoons olive oil, divided
  • 2 cups grape tomatoes, halved (optional)
  • 1/2 teaspoon salt
  • 1/4 teaspoon freshly ground black pepper
  • 3 garlic cloves, coarsely chopped
  • basil, chopped (optional; delicious when it's in season!)
-Heat broiler.  On a baking sheet (preferably lined with aluminum foil for easy clean up), toss tomatoes, 1 tablespoon oil, salt, pepper and garlic cloves together.  Broil for 5-8 minutes, until lightly charred, stirring halfway through.
-Combine 2 tablespoons water and egg in a shallow dish, mixing well. Using a fork, combine panko and cheese in a second shallow dish. Dip each ravioli in egg mixture then coat in panko mixture.
-Heat a large skillet over medium-high heat. Add 1 tablespoon oil to pan to coat. Add half  of ravioli to pan in a single layer (I had to do one-third); sauté 1 minute on each side or until golden. Remove ravioli from pan using a slotted spoon; drain on paper towels. Keep warm. Repeat procedure with remaining oil and ravioli. Wipe skillet with paper towels.
-Serve ravioli with broiled tomatoes, tomato sauce and basil.

Sunday, January 16, 2011

Homemade Ravioli & Week's Menu Plan

With a long weekend, I definitely plan to put it to good use: making homemade ravioli.  It's incredibly simple to make but you do need some extra time on your hands.  However, once the ravioli is made, you can refrigerate it or freeze it to make a delicious homemade dinner about 5 minutes flat.

If you're ambitious and have the right tools, you can actually make the ravioli pasta yourself.  But for everyone else, store-bought wonton wrappers are the surprising choice for the pasta. They provide a light and delicate wrap and are just the right size.  You can stuff anything you'd like in the ravioli - cheese, sweet potatoes, mushrooms, etc.  My choice is spinach and ground turkey breast.


Homemade Ravioli
Makes 30-40 ravioli
 
Ravioli filling:
Taken from: AllRecipes

  • 4 ounces (1/4 pound) ground turkey breast
  • 2 cups fresh spinach
  • 1 tablespoon grated Parmesan cheese
  • 1 tablespoon breadcrumbs or panko
  • 1/4 teaspoon dried spices (I use a 1/4 teaspoon of each: oregano, thyme, basil, onion powder and garlic powder)
  • 1 tablespoon olive oil
  • 1 egg white
  • salt and ground pepper
-Heat a large skillet over medium-high heat and stir in the ground turkey. Season lightly with salt and pepper. Cook and stir until the beef is crumbly, evenly browned, and no longer pink. Drain and discard any excess grease. Stir in the spinach and cook until wilted, about 1 to 2 minutes. Remove from heat and allow to cool for 10 minutes.
-Transfer the beef mixture to a bowl. Add the Parmesan, parsley, bread crumbs, olive oil, egg, garlic salt, and pepper and mix well. Run the filling through a grinder until smooth (or puree in a food processor until smooth).
 
Ravioli preparation:
Taken from: Faithful Provisions
  • Wonton wrappers (approximately 40)
  • Small dish of water
-Lay wonton wrappers out on workspace, have a small dish of water to dip your fingers in to wet wonton so it will seal.
-Lay out two wrappers, and top one with approximately one tablespoon of filling of choice.
-Brush the edges of the wrapper with water and lay the second wrapper on top, seal edges (I also press down with edge of a fork to help seal the edges).  Continue until you use all the filling.
-To freeze the ravioli: Cover a baking sheet with parchment paper. Lay ravioli in a single layer and place in freezer for about 30 minutes.  Once ravioli is frozen, it can be placed in a freezer bag and stored for up to 3 months.  This helps to ensure that the ravioli do not stick to one another.
-To cook ravioli: This can be cooked from fresh or directly from frozen.  Boil a pot of water and cook ravioli for about 2 to 3 minutes.  Keep it at a low boil.  Drain and serve.

Week's Menu Plan
 

Monday: pizza
 
Tuesday :  crisp ravioli  (homemade) served with steamed artichokes

Wednesday: Mujadara and spanakopita

Thursday: Chicken cacciatore with roasted cauliflower

Friday: appetizers

Saturday, January 15, 2011

Cinnamon Apple Cake

 Photo taken from Cooking Light

I often like to make something that's not only great for our weekend dessert but would also be delicious in the morning.  I found this cake on The Sweets Life and it was phenomenal! The apple and cinnamon combination is great but what really makes this cake stand out is how light and moist it is.

I used Cooking Light's photo of this delicious cake because I didn't have enough time to take one ourselves. I baked the cake the night before (Bryant laughed and declared I was the only person baking a cake at 9 pm. Which is probably true.) and then gave it to Bryant to take to work.  When he came home, he returned an empty cake pan. Luckily, I had been able to snag a piece (or two) before it disappeared.

Cinnamon Apple Cake
Taken from: The Sweets Life
Serves: 10-12
  • 1 3/4 cups sugar, divided
  • 1/2 cup (1 stick) margarine, softened
  • 1 tsp vanilla extract
  • 6 ounces fat-free cream cheese
  • 2 large eggs
  • 1 1/2 cups all-purpose flour
  • 1 1/2 tsp baking powder
  • 1/4 tsp salt
  • 2 tsp ground cinnamon
  • 3 cups chopped peeled Rome or Fuji apple (about 2 large)
-Preheat oven to 350F.
-In a large mixing bowl, beat 1 1/2 cups sugar, margarine, vanilla, and cream cheese until well-blended. Add eggs one at a time, beating after each addition.
-In a separate bowl, combine flour, baking powder, and salt. Add flour mixture to creamed mixture, beating at low speed until blended.
-In a small bowl, combine 1/4 cup sugar and cinnamon. Mix 2 tbsp of cinnamon sugar mixture in a large bowl with chopped apples, stirring to coat. Pour apple mixture into cake batter and stir to combine.
-Pour batter into a 9-inch springform pan (I used a regular 9-inch round cake pan) coated with cooking spray. Sprinkle with remaining cinnamon mixture.
-Bake at 350F for 1 hour 10 minutes (mine was done within 55 minutes so check then) or until the cake pulls away from the sides of the pan. Cool cake completely on a wire rack before removing and cutting into slices.

Sunday, January 9, 2011

Breakfast Quinoa & Week's Menu Plan

Breakfast is by far my favorite meal.  Since I've been cooking much more these last couple years, dinner is rapidly closing in but somehow, I don't think it can surpass breakfast in my book.  I love the elaborate breakfasts - any thing with eggs or some kind of sweet carb - and I even love the simple ones (when Bryant goes out of town, I happily eat cereal for dinner).  With our wonderful Christmas and New Years celebrations, I've had my fair share of those big breakfasts. However, I wanted something special for our lazy Saturday...just without the extra fat and sugar.  Bless you, breakfast quinoa, for gracing our presence.

Quinoa is incredibly good for you and I love it's nutty flavor.  I've only made it in savory dishes but was really happy to find a sweeter version.  Adding a couple tablespoons of brown sugar, maple syrup or honey gives it a subtly sweet flavor. We topped ours with toasted pecans, sliced almonds, dried cranberries and frozen cherries.  A nice and healthy way to start a weekend!

Breakfast Quinoa
Serves 3-4 (makes 2 cups)
  • 2 cups milk or 1 cup milk and 1 cup water (I chose the water/milk option)
  • pinch of salt 
  • 1 cup quinoa, rinsed
  • 3 tablespoons of light-brown sugar, honey or maple syrup (or a combination)
  • 1/2 teaspoon ground cinnamon
  • 1/3 cup toasted pecans or almonds
  • 1/4 - 1/2 cup fresh, dried or frozen fruit (any kind of berries, cherries, cranberries, apples, etc would work really well)
-Bring milk and water to a boil in a small saucepan. Add small pinch of salt and quinoa, and return to a boil (watch carefully as my pot boiled over when I stopped looking). 
-Reduce heat to low, and simmer, covered, until three-quarters of the milk has been absorbed, about 15 minutes.
-While quinoa is cooking, heat medium saute pan to medium.  Add nuts to the dry pan and toast, shaking occasionally, for 3 minutes. 
-Stir in sugar and cinnamon. Cook, covered, until almost all the milk has been absorbed, about 3-8 minutes. Top with nuts and fruit of your choice.  Serve with additional milk and sweeteners if you choose.


Week's Menu Plan

Sunday: Butter Chicken and rice with carrots, celery and peas

Monday: loaded baked potato (chili, broccoli, cheddar cheese, green onions, bacon)

Wednesday:  Pecan-crusted cod with couscous and roasted brussels sprouts
 
Saturday: chicken parmesan burgers
Sunday: Maely's chicken with sweet potato casserole and salad

Saturday, January 8, 2011

Lentil Soup

There's really nothing like soup on a cold day (although I'd happily eat it on a hot day, too!).  And lentil soup happens to be one of our favorites - lots of vegetables (but less chopping than I had expected), incredibly good-for-you lentils and a tomato-based broth.  Mmmm.  There are also a lot of ways to make it your own - some people add cumin and curry spices for a more Indian flair but for us? Grated parmesan cheese and crumbled bacon sprinkled on top of each bowl does the trick. 
However, we had to make do with only parmesan this time.  I have plenty of bacon in the freezer so a lack of bacon wasn't the reason.  Instead, while cooking, our bacon caught on fire.  I like to broil bacon by placing a drying rack on top of a cookie sheet; this makes the bacon nice and crisp as pan-frying just doesn't work well for me.  Broiling also allows a lot of the fat to drip off the bacon onto the cookie sheet. I've been using this technique for a while but accidentally set the bacon on the top rack (I usually do second from the top).  When I pulled the bacon out, expecting a nicely crisped piece, I saw a small flame instead consuming our bacon.  Luckily, we always have baking soda so we successfully doused the flame (and sadly, bacon right along with it).

So whether you have bacon or not, try this lentil soup recipe! We served it with cornbread but a slice of good bread would go well with it, too.

Lentil Soup
Taken from: AllRecipes
Serves: 8-10
  • 1 onion, chopped
  • 2-3 tablespoons olive oil
  • 4 carrots, diced
  • 3 stalks celery, chopped
  • 4 cloves garlic, minced
  • 1 1/2 teaspoons dried oregano
  • 2 bay leaves
  • 1 1/2 teaspoons dried basil
  • 1 (28 ounce) can crushed, diced or whole peeled tomatoes (I had whole peeled tomatoes which I chopped up), including juice
  • 2 cups dry lentils
  • 8 cups water (could substitute chicken broth for all or part of the water)
  • 2 cups spinach, rinsed and thinly sliced
  • 2 tablespoons vinegar
  • salt to taste
  • ground black pepper to taste
  • 2 tablespoons wine (optional)
  • grated parmesan cheese, for serving
  • 2-4 slices of cooked bacon, for serving
-In a large soup pot, heat oil over medium heat. Add onions, carrots, and celery; cook and stir until onion is tender. Stir in garlic, bay leaf, oregano, and basil; cook for 2 minutes.
-Stir in lentils, and add water and tomatoes (including the juice). Bring to a boil. Reduce heat, and simmer for at least 1 hour. When ready to serve stir in spinach, and cook until it wilts. Stir in vinegar and wine, and season to taste with salt and pepper.
-Serve with grated parmesan and crumbled bacon on top, if desired.

Thursday, January 6, 2011

Roasted Chickpeas

I needed something to round out our chicken gyro meal tonight -- even though we had tzatziki (mmmm, my favorite), Trader Joe's Mediterranean hummus and all the classic gyro fixins', it still seemed like we needed a bit more.  Since I haven't done any real grocery shopping in 2 weeks (a new record for me, although I made Bryant make an emergency trip for 6 much-needed ingredients), it drastically narrowed the options available to me for a good Greek side dish. Enter: roasted chickpeas.

These roasted chickpeas are really more of a snack than a side dish but they are surprisingly addictive, cheap and healthy. I also like that this recipe consists of 5 common pantry ingredients.  Bryant can't seem to stop eating them when I make them.

Roasted Chickpeas
Taken from: Cheap, Healthy, Good
Serves 2-4
  • 1 14.5 oz can chickpeas, drained and rinsed
  • 1 teaspoon olive oil
  • ¼ teaspoon salt 
  • 5 dashes cayenne pepper
  • 1 teaspoon cumin 
-Preheat oven to 425°F.
-Place chickpeas on baking/cookie sheet. Roast for 10 minutes. Shake the pan. Roast another 10 minutes.
-In a medium bowl, combine chickpeas, oil, salt, and spices. Stir well to combine.
-Spread chickpeas back out on baking sheet. Roast between 5 and 15 more minutes, until they're browned and super crunchy. Serve.

Wednesday, January 5, 2011

Lettuce Wraps

Over the Christmas holiday, Bryant and I went to a happy hour at PF Changs with his brother and sister-in-law.  I hadn't been to PF Changs in years but the one thing I remembered from their menu was their chicken lettuce wraps.  I had to get them and they were delicious.

However, perhaps I'm biased but as good as PF Changs' wraps are, I think mine are better.  So after we got back from the our New Year's trip (and I hadn't gone to the grocery store), this was the first dish I thought of.  We had almost all the ingredients on hand, making it a very simple meal to prepare. Serving it with a little brown rice just topped it off.

As sort of an unspoken New Years resolution, we also finally have a picture of our meal! However, we can't find the camera cord so I don't know how successful we'll be in 2011 of posting pictures...(Update: Finally found it! Just where I last placed it...under the couch.)

Lettuce Wraps
Taken from: Everyday Food
Serves 4
  • 1/4 cup soy sauce
  • 4 teaspoons fish sauce
  • 4 teaspoons sugar
  • 1 tablespoon canola oil
  • 1 large shallot (or 1/4 cup onion), finely chopped
  • 2 tablespoons minced peeled fresh ginger
  • 2 garlic cloves, minced
  • 1 small jalapeno or serrano chile, seeded and finely chopped
  • 1 pound ground turkey breast (you could also substitute ground chicken, pork or beef))
  • 1 large head of Bibb, Boston, or Romaine lettuce, leaves separated
  • grated carrot, chopped cabbage, thinly sliced green onions and sliced lime
-In a small bowl, combine soy sauce, fish sauce, and sugar and stir until sugar dissolves. Set sauce aside.
-Heat a large skillet or wok over high until hot. Add oil and swirl to coat skillet. Add shallot, ginger, garlic, and chile and stir until fragrant, about 30 seconds. 
-Add turkey and cook, breaking up meat with a wooden spoon, until almost cooked through, 5 minutes. Add half the sauce to skillet and stir until meat is cooked through, about 2 minutes. 
-Serve in lettuce leaves with remaining sauce, grated carrot, chopped cabbage, thinly sliced green onions and slices of lime.

Sunday, January 2, 2011

Homemade Tortilla Chips & Week's Menu Plan

After a wonderful Christmas in Seattle and celebrating New Year's in San Diego, it's good to be back (of course, it doesn't hurt that I got lots of gifts for my kitchen!).  It was even nice to take a break from the kitchen and have good food made by other people.

One wonderful thing about living in California (and I've probably mentioned it before) is (cheap) avocados all year round!  Bryant's specialty is guacamole and to complement that, I found a quick and easy recipe for homemade tortilla chips.  They're also healthier than store bought, not to mention cheaper.

Even if you don't have avocados this time of year, try these chips with our favorite salsa.

Homemade Tortilla Chips
Taken from: AllRecipes 
  • 1-2 corn or flour tortillas
  • 1 teaspoon olive oil
  • 1 tablespoon lime juice
  • 1/4 teaspoon ground cumin
  • 1/4 teaspoon chili powder
  • 1/4 teaspoon salt
-Preheat oven to 350 degrees F.
-Cut each tortilla into chip sized wedges and arrange the wedges in a single layer on a cookie sheet.
-In a small bowl, combine the rest of the ingredients. Mix well and brush on each tortilla wedge.
-Bake for 3-4 minutes and then rotate the cookie sheet 180 degrees in the oven (this allows the chips to cook more evenly because the back of the oven is hotter than the front). Bake for another 2-3 minutes or until the chips are crisp, but not too brown. Serve with salsas, garnishes or guacamole.

Week's Meal Plan

Sunday: Apple Chicken Quesadillas with guacamole and Mexican bean salad

Monday: skirt steak salad with cornbread muffins

Tuesday : ground turkey lettuce wraps

Wednesday:  lentil stew with leftover cornbread muffins

Thursday: chicken gyros with tzatziki

Friday: burgers with sweet potato fries
      Weekend dessert (decisions, decisions): Mocha brownies or almond butter snickerdoodles